

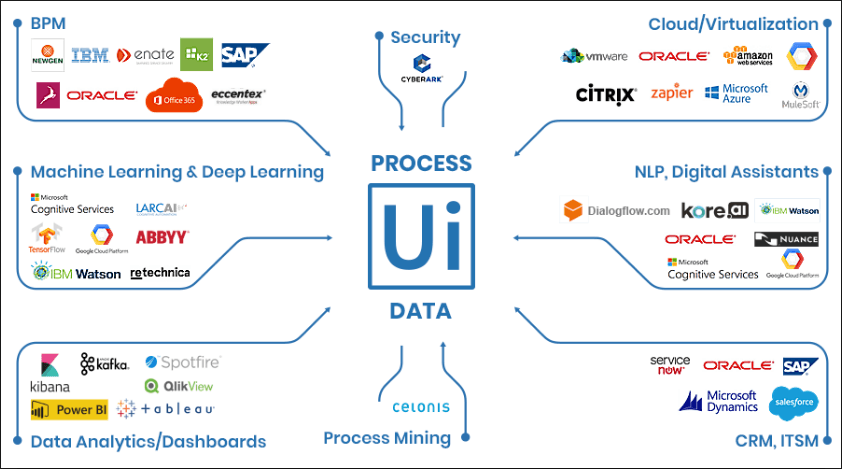
UIPath is an amazing tool for doing UI based automations. It does support tons of processes and you can additionally add custom snippets using c# but what took my attention was it’s amazing and accurate support to ui Web Scrapping.
UIPath And Its functionalities
Many of you may think that open source tools like Selenium are well optimized for UI Automation (especially for the case of web browser) and I do agree to that, but here’s the thing :- I have seen Selenium failing miserably while performing UI Operations within an I-frame tags that are created in dynamically rendered JavaScript pages which use React/Vu/Angular frameworks to build up their frontend.
Similar to This: Intermediate level coding in HTML
In case you’re confused with the terms: I-frame and dynamically rendered Javascript pages, let’s first understand what they are and then maybe we could deep dive to our use case.
›What are I-Frame Tags?
I-frame tag is nothing but inline frame which allows to embed multiple documents within a frame inside an html. For example you have two html documents:
- index.html
- subdocument.html
And you want to embed the subdocument.html within index.html, you go something like this:
<iframe src="src/subdocument.html" width="800" height="600"></iframe>
As you can see, it’s pretty simple to use I-Frame tags to embed different documents within HTML. But since this article isn’t about iframes and so let’s go back to our actual discussion.
›What are dynamically rendered JavaScript Pages ?
With enhancement in JavaScript and it’s frameworks, now it’s very simple to build complex web pages with these frontend JavaScript frameworks such as React, Vue, Angular, etc.
JavaScript makes it really easy to manipulate various actions, perform on the go rendering, add complex animations (though that is more of CSS styling) and much more.
Though these frameworks do add a lot to frontend development, but additionally this means that while performing web scrapping we need to be more careful about the presence and absence of a UI element on screen.
This adds to additional complexity and needs us to take care of many new things, like time delay before an element appears, scrolling or hovering etc. And hence these dynamic elements add problems to web scrapping and UI Automation.
›Example of Dynamic JavaScript Rendered Pages
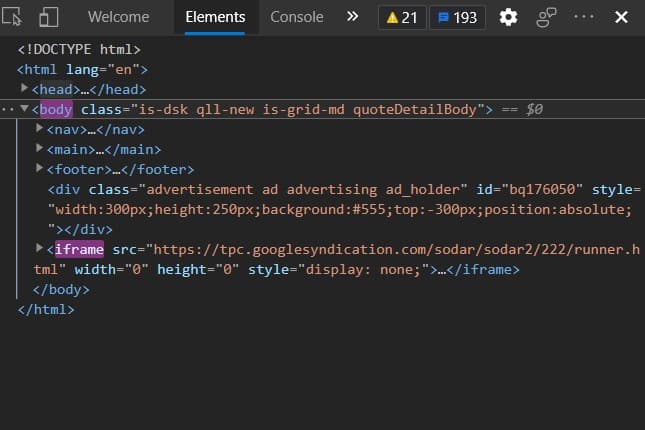
If you’re looking to check out any dynamic Javascript rendering in action, you may go to brainyQuotes and open your developer console by using (ctrl + shift + I) in windows and (cmd + shift + I) in mac.
Make sure, you developer tools is in the Elements tab where you could visualize the entire html DOM of the page. While scrolling through the page, you may see your DOM keeps flashing and new element keeps on adding. This is an example of dynamic JavaScript Rendering.
›What about Ghost Drivers and Headless Scrapping ?
Many of you maybe using Ghost drivers like Phantom JS or headless scrapping for such use cases, but I have been trying them all and trying to scrap a DV360 Page which failed badly. In case you don’t know, DV360 is a demand side platform used in programmatic marketing.
If anyone of you might be using it and if you’re able to scrap the page, please let me know in the comments, that would be really helpful and a new thing to learn for me as well.
Scheduling a UIPath Script as a Startup Script in Windows Server
It doesn’t matter whether you’re using AWS, GCP or Azure Cloud. All you need is to schedule the instance startup. You can use AWS Instance Scheduler for AWS, Cloud functions in addition to Cloud pub sub Scheduler for GCP and Configuration Policies for Azure.
Once you’re done scheduling the instance, you may want to test it first before going for setting up UIPath startup script.
Similar to This: Making a Fun Self Quiz Application using Flutter and Dart
Once we’re done setting up instance startup here are the things which we need to follow:-
- Setting Up Auto Login in your Windows 10 Instance.
- Setting Up UIPath bat file script.
- Moving the bat file script into startup folder of Windows 10.
Let’s go through them one by one :-
›Setting Up Auto Login in your Windows 10 Instance
Here are the steps you need to follow to Setup Auto login:
- Press Windows + R or manually go to start search for Run and open the Run Executer or command Box.
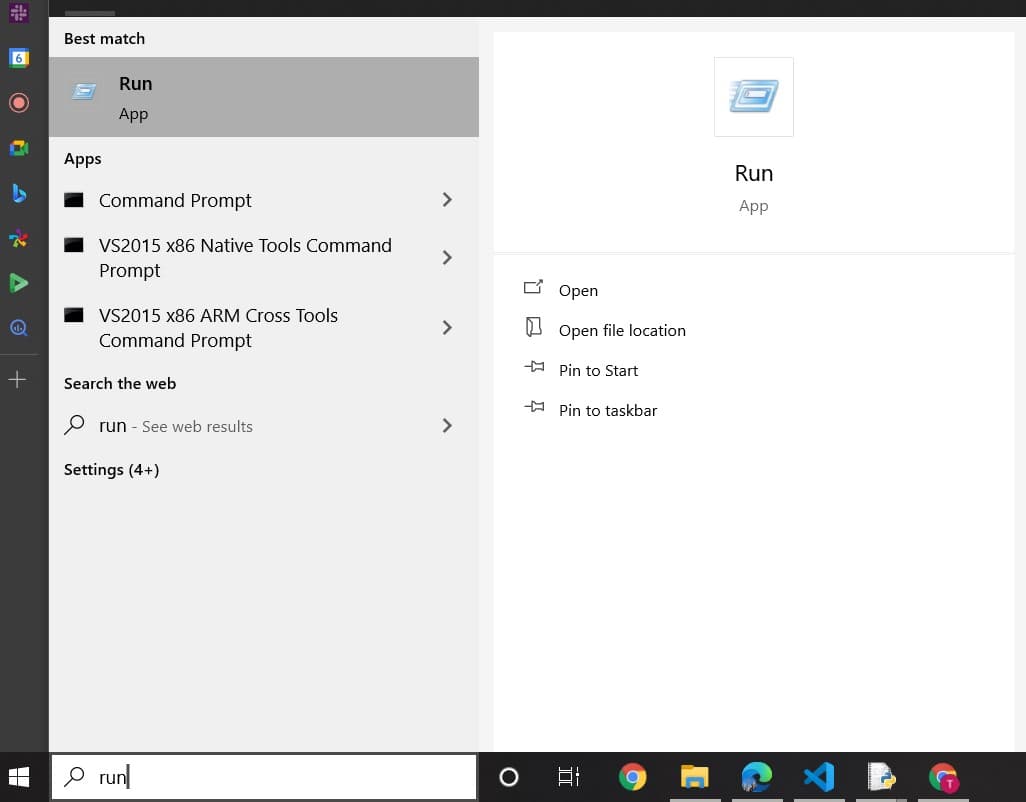
- Now type in netplwiz and hit Enter.
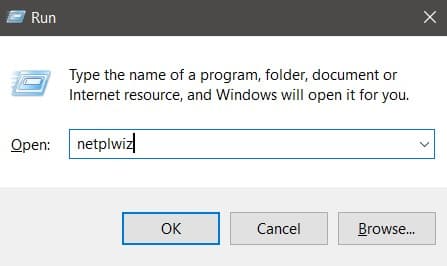
- Now Uncheck the box that says: “Users must enter a user name and password to use this computer“.
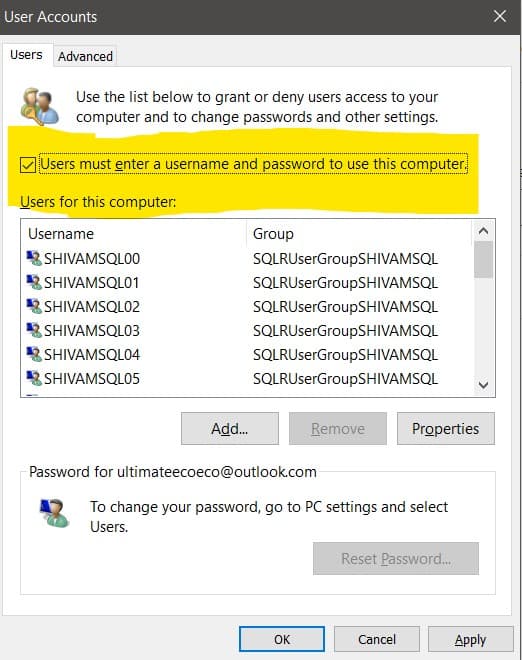
- When you click Ok, this brings up another pop up that will ask you for your username and password. Just enter the credentials of your windows instance that you use to make RDP (Remote Desktop Protocol) connection. In simple words it’s your username and password that you input to login into your windows instance (that is running on cloud) and please don’t confuse it with the credentials of your local windows machine.

- Once you fill in the credentials and press ok, we’re good to go for our next configuration that is setting up the bat file for UIPath.
›Setting Up UIPath Batch Script From XAML File
Hopefully, you have created and tested your UIPath .xaml file and you’re ready to deploy it over cloud. But before going for the deployment we need to create a simple bat file.
Earlier UIPath allowed to convert its xaml files to executables (exe). which was actually amazing but then for some of their concerns like tracking and all they stopped supporting exe conversion.
Though I really appreciate the Work they have done in robotic process automation domain it would have been really amazing if they would support back the exe support.
And I totally understand, they have their own terms and requirements for not doing so, but hopefully they don’t disable bat conversion as well in future. Or else this entire hack will fail there. 😛
CREATING A .BAT FILE
Creating a .bat file is probably the simplest step in Windows. Open notepad, write the bat command and save it with an extension of .bat and file type to all files. Additionally, just to mention, try to keep your bat file name more specific like: schedulerscript.bat or so. Though I haven’t faced it but sometimes these bat names overlap with some default bat script names which can cause you some unknown issues.
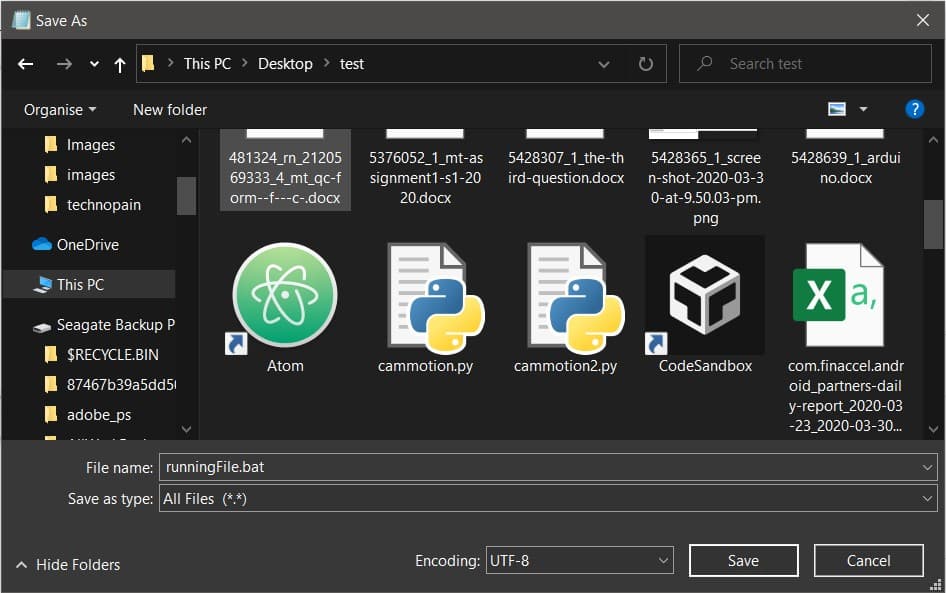
›Building .bat for UIPath Script
Coming back, so for example your UIPath files are located in a folder: C:/UIPathFiles/ And the script that you want to automate is main.xaml (for example, though it could be anything else you might have created as a side file as well) then the command to run this file from a bat file will be something like this:
"<Location to UiRobot.exe>" -file "<Location to main.xaml>
Here is an example for same:
"C:\Users\DELL\AppData\Local\UiPath\app-20.10.6\UiRobot.exe" -file "C:\Users\DELL\uiScrapping\Main.xaml"
Once you’re done creating the bat file, I would recommend it testing once as there can be some errors. Just double click on the bat file and wait for a minute to see it running.
Once you confirm that it starts running, now is the time to move to our final step.
›Moving .bat File to the Startup Script of Windows 10
I promise, we’re almost done. Now since everything is ready… we have created the bat file and tested it, it’s time to deploy it as a startup script of our windows 10 instance.
We again need to open run executor as we did while setting up Auto Login feature and this time we need to put in: shell:startup and hit enter.
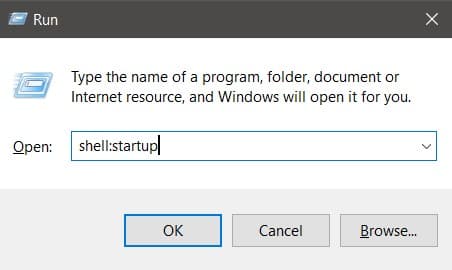
Once the folder opens, all you need to do is to paste your bat file created in early steps and for all kinds of cross check, I would recommend once running the bat file from there again.
In case it runs, boom! you did it… our deployment is now done. Try testing it out and see if it worked as you expected it to. In case, you still struggle with something don’t forget to check our Youtube Video for the step by step explanation.
Similar to This: Setting up Matlab based Raspbian OS for raspberry pi
Happy Automation 😀